Introduction
The Camera RAW filter is an essential tool for photographers and digital artists, providing powerful controls for processing raw image files. In older versions of Photoshop like CS6, the Camera RAW filter might be missing or disabled by default. This tutorial will guide you through checking for, downloading, and installing the Camera RAW filter specifically for Photoshop CS6 on both Windows and Mac systems.
Part 1: Checking for Camera RAW
To check if the Camera RAW filter is already installed but not enabled:
- Open Photoshop CS6
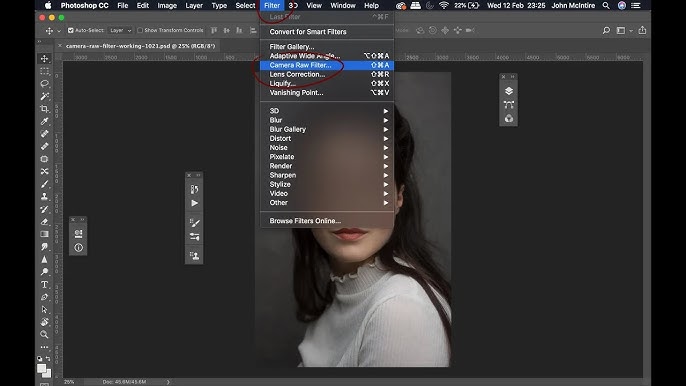
- Go to the Filter menu at the top of the screen
- Look for “Camera Raw Filter” in the dropdown menu
If you don’t see it, the filter may not be installed or may be an older version that doesn’t include the filter functionality.
Part 2: Downloading the Correct Version
Photoshop CS6 requires a specific, older version of the Camera RAW plugin. Newer versions won’t work with CS6.
- Visit Adobe’s official website and navigate to their support/downloads section
- Search for “Camera RAW plugin for CS6” or look for legacy downloads
- Download the version specifically labeled for Photoshop CS6 (usually version 9.1.1 or similar)
- Make sure you download the correct version for your operating system (Windows or Mac)
It’s crucial to download from Adobe’s official site to ensure compatibility and security.
Part 3: The Installation Process
Windows Installation
- Close Photoshop CS6 completely
- Locate the downloaded installer file (usually a .exe file)
- Right-click the installer and select “Run as administrator”
- Follow the on-screen installation prompts
- The installer will automatically detect your Photoshop CS6 installation
Mac Installation
- Close Photoshop CS6 completely
- Locate the downloaded installer file (usually a .dmg file)
- Double-click the .dmg file to mount it
- Double-click the installer package to begin installation
- Follow the on-screen installation prompts
Part 4: Enabling the Filter
After installation is complete:
- Restart your computer to ensure all changes take effect
- Open Photoshop CS6
- Open any image file
- Go to Filter > Camera Raw Filter
- The Camera RAW interface should now appear
If you still don’t see the filter, you may need to convert your image to a Smart Object first by right-clicking the layer and selecting “Convert to Smart Object.”
Common Errors
Here are solutions to potential issues you might encounter:
- “This version is not compatible” – You downloaded the wrong version. Ensure you have the CS6-specific version of Camera RAW.
- Filter doesn’t appear after installation – Try restarting your computer, not just Photoshop. Also ensure you’re opening a supported file type (JPG, TIFF, RAW formats).
- Installation fails – Run the installer as administrator (Windows) or ensure you have the necessary permissions (Mac).
- Camera RAW opens but looks different – Different versions have different interfaces. The functionality remains largely the same.
Conclusion
Adding the Camera RAW filter to Photoshop CS6 dramatically enhances your image editing capabilities. With its powerful exposure controls, color grading tools, and lens correction features, you can achieve professional-quality results with RAW files and other image formats. While CS6 is an older version, having the latest compatible Camera RAW plugin ensures you can work with newer camera formats and enjoy many of the features found in more recent Photoshop versions. The improved workflow and image quality make this upgrade well worth the effort.